thankQ Help
The next step is to add the correct thankQ database fields in to the template, so that name and address details appear correctly.
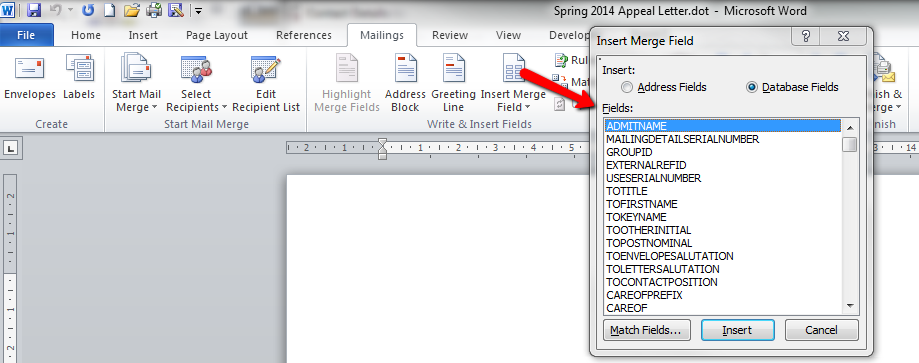
1.Ensure that you are on the Mailings ribbon.
2.Click on the Insert Merge Field button itself (NOT the drop down arrow) and a list of thankQ merge fields will appear.

3.Double click to select the following fields in THIS ORDER. An explanation of the purpose of each merge field is described below. It is NOT necessary to click Insert after each one.
TOENVELOPESALUTATION
TOCONTACTPOSITION
CAREOFPREFIX
CAREOF
MAILINGDETAILSUBADDRESS
ORGANISATIONNAME
ADDRESSLINE1
ADDRESSLINE2
ADDRESSLINE3
ADDRESSLINE4
POSTCODE
TOLETTERSALUTATION
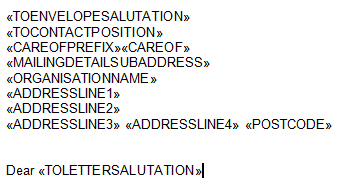
4.When all fields have been selected, click the Close button. Your merge fields will appear as shown below. This may look messy, but it is much quicker to select all the required fields in one go and then position them correctly afterwards.

5.Reposition the merge fields so that they appear the same as in the diagram below.

6.To ensure that ALL letters are correctly addressed, you need to enter ALL of the addressing merge fields in to your Word template.