thankQ Help
1.You should be returned automatically to the correct Web Payments record. If this does not happen, access the Web Payments options within the Finance Module and locate the relevant payment.
2.On the Web Payment form, click on the Accept button.
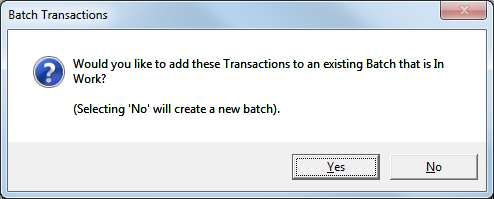
 |
3.You will be prompted to create a new batch or add this payment to an existing batch. It is important that web payments are kept in separate batches and are not combined with other types of payments. If you do NOT have a web payments batch open, click No.
 |
4.If you do have a web payments batch open, click Yes. Will be then be prompted to select a Batch to add the payment to. Double click on the relevant batch.
 |
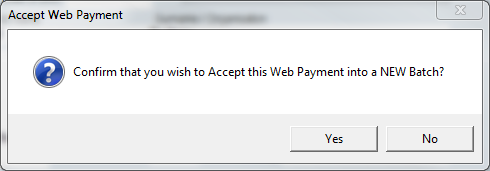
5.If you created a New Batch, Click Yes to confirm.
 |
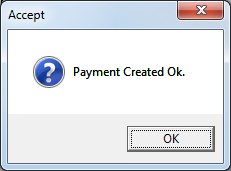
6.The payment will be created and a confirmation message box will appear when this has been completed. Click Ok.
 |
7.The payment will now appear as Accepted. The Batch / Pledge ID and the Auto ID fields (the payment Item/Receipt number) will be displayed as hyperlinks.
 |