thankQ Help
1.Click Create on the tool bar of the Data Import form
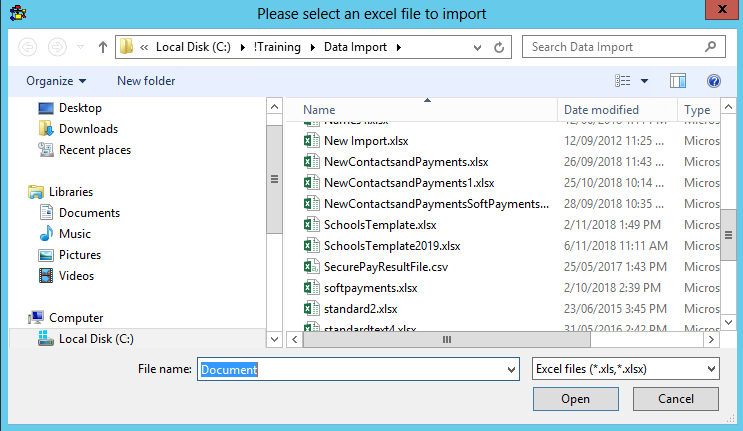
2.Click the ellipse on the Excel Input File line

3.Locate and select the import file
4.Enter an Import Description
5.Select the Configuration if applicable

6.Make sure the headers of the spreadsheet are matched correctly to thankQ e.g. IMPORT_SUBJECT

7.Click the drop down beside Select Sheet to select the next sheet to map

8.Continue to select the worksheets and make sure the headings are matched
9.Double click on a field header that has an X to indicate it requires mapping.
10.Select the table from the drop down which coincides with the information
Holiday Dates:
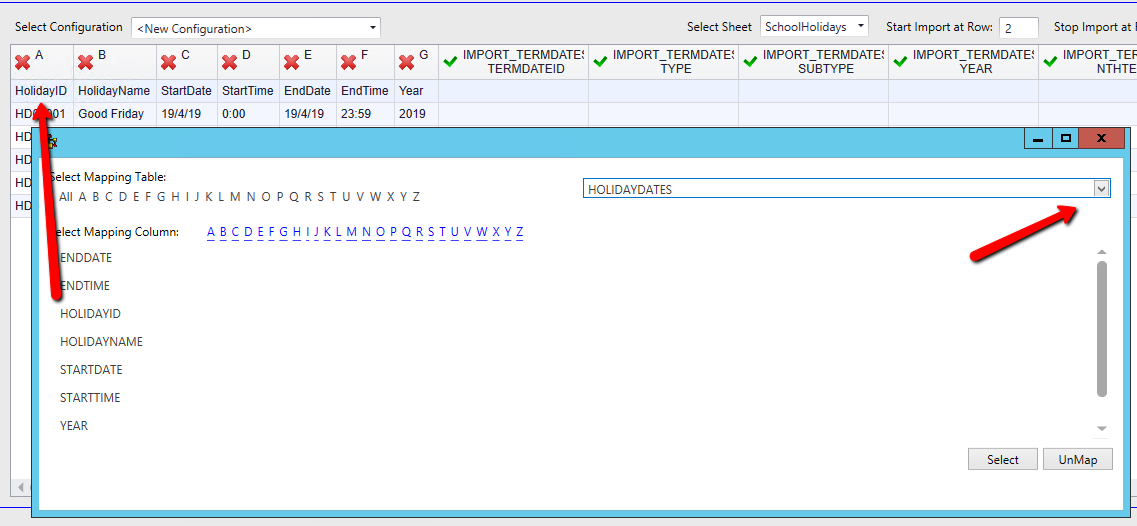
11.Double click on the field to map
12.Continue to map the fields that have an X

13.Continue through the sheets and map any fields that have not found the correct field
Term Holidays:
These fields have mapped incorrectly and one has not been mapped. They need to map to the Term Holidays.

14.Double click into the first cell
15.Select Term Holiday from the table list
16.Double click on the field that this information belongs to
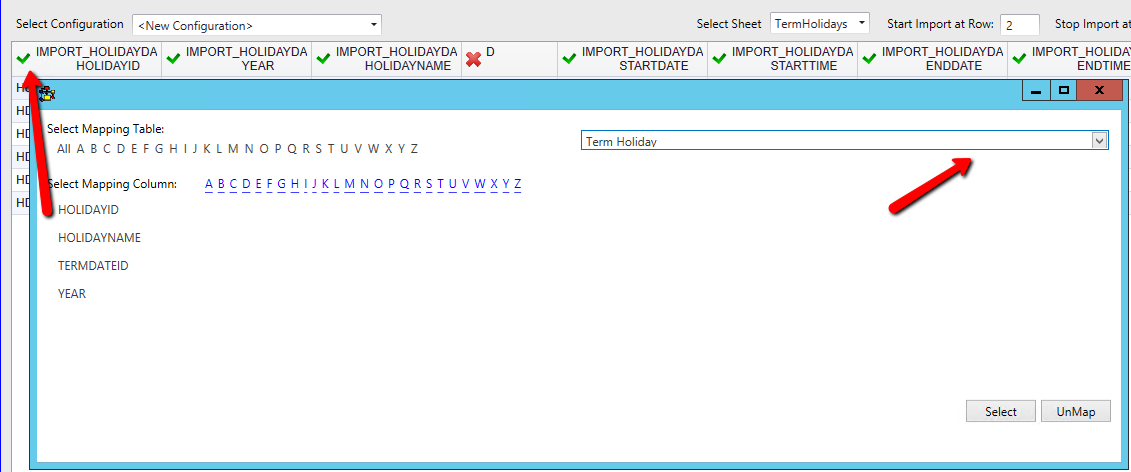
17.Continue to remap and map the fields required making sure they read IMPORT_TERMHOLIDAY
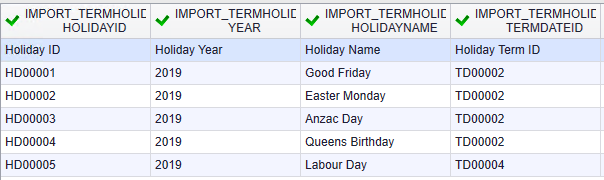
18.Continue to check the worksheets making sure they are mapping to the correct table and field
19.Map Class Term
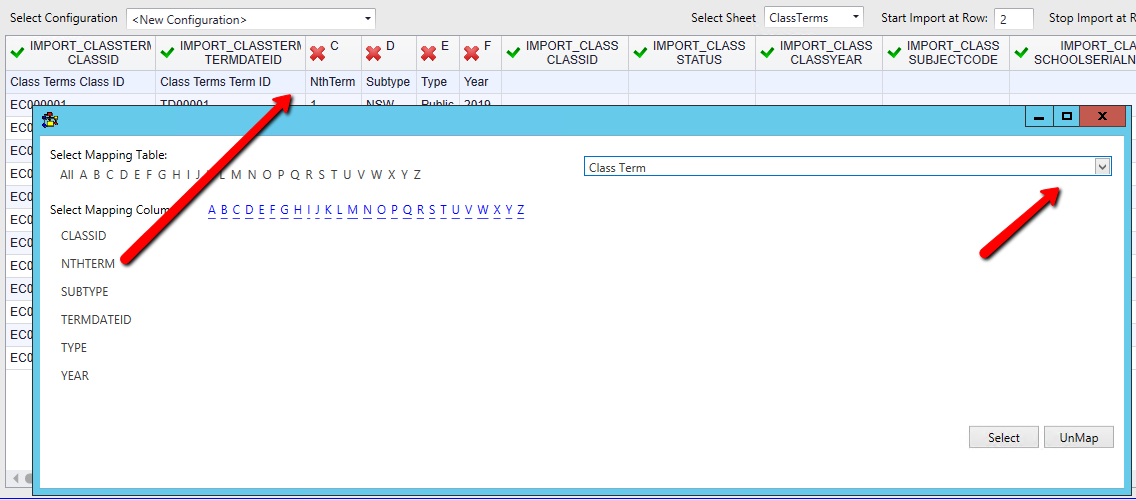
Example:

20.Continue to go through the worksheets
21.Map Class Schedule

22.Continue to go through the worksheets
23.Select Class Teacher as the spreadsheet had an extra field that is not required and this should be unmapped so it does not cause any validation errors when importing
24.Double click into the cell for the Student Teacher, select Class Teacher from the drop down table and click UnMap
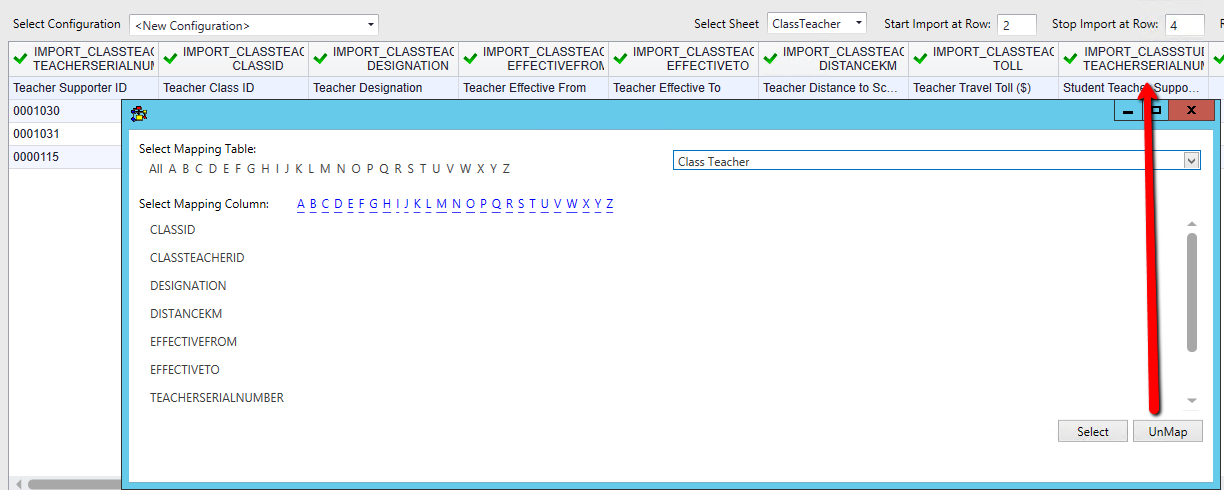
Example:

25.Select the next worksheet Class Student

26.Double click into the first unmapped cell, select the Class Student table and double click on the applicable field
27.Continue to map any other fields

28.Click Log Data at the bottom once you have mapped all the fields
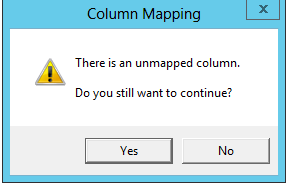
29.Click Yes if there are fields that have an X but are not to be imported or No to return and map
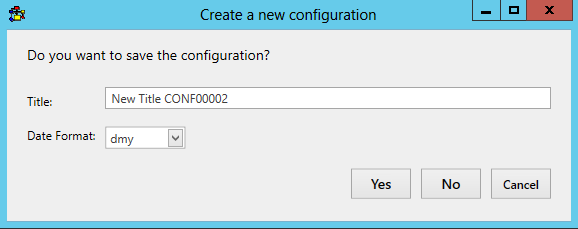
30.Click No to continue without saving a configuration
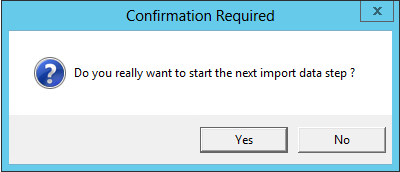
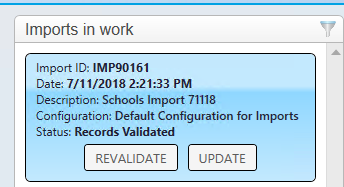
31.Click Validate once the import is in work
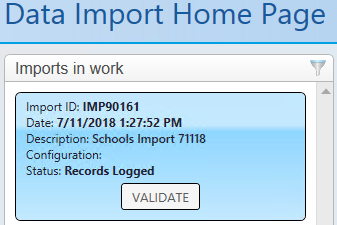
32.Click Yes to continue
33.If there are any validation errors double click on the import in that window
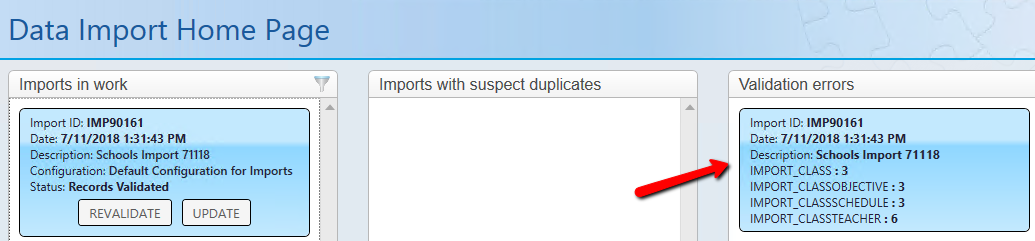
34.Click on the arrows to open the fields to see the errors
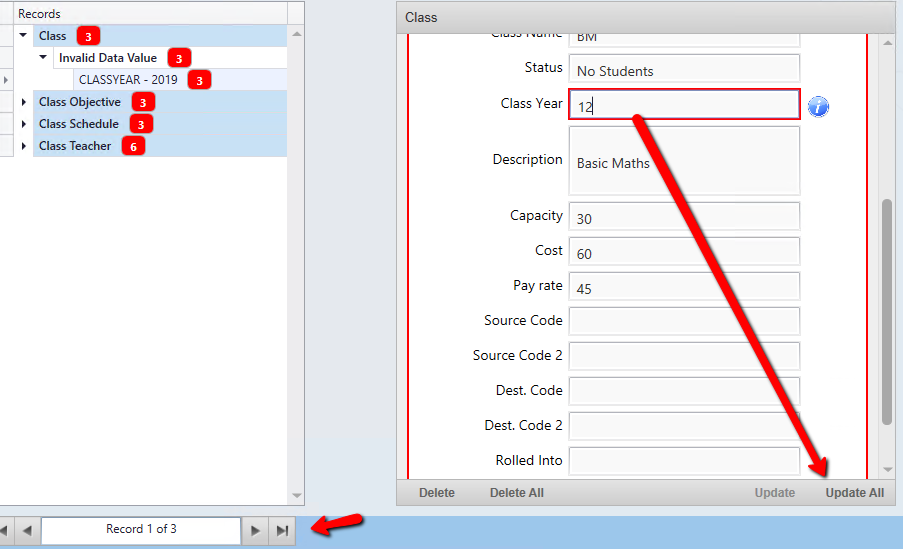
35.Amend the Class Year to be the school year grade
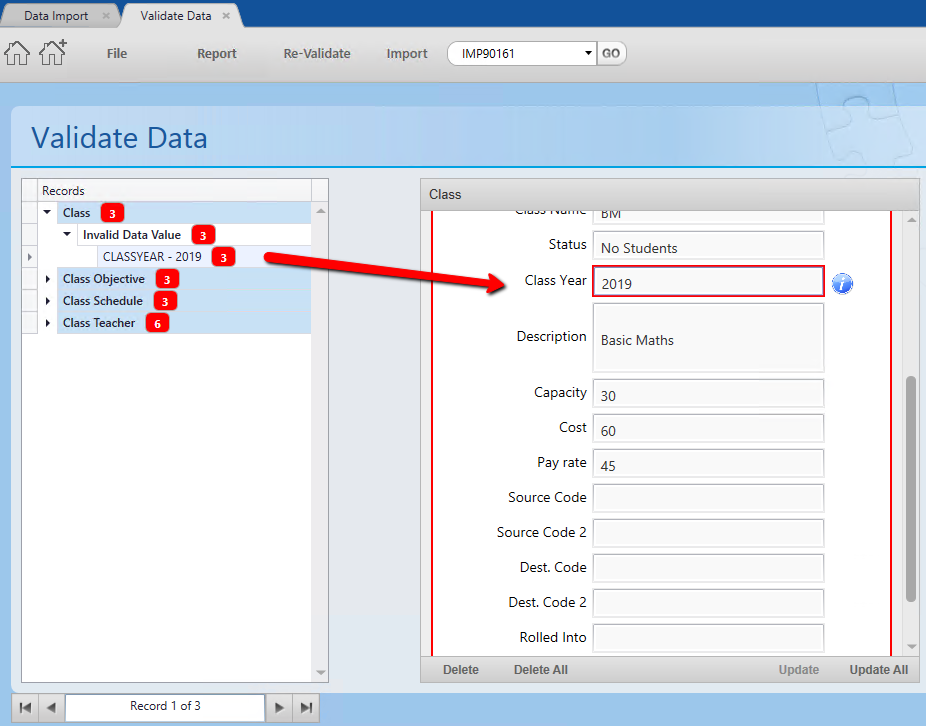
36.If all the records are the same click Update All at the bottom, if not click the record selector to move to the next record and make the appropriate amendments. Update All will only be available if you clicked on the field error on the left e.g. CLASSYEAR – 2019
37.Open the next error
38.Enter the required information. These records all have different Subject Codes so in this instance click Update at the bottom and then move to the next record by way of the record selector and repeat.

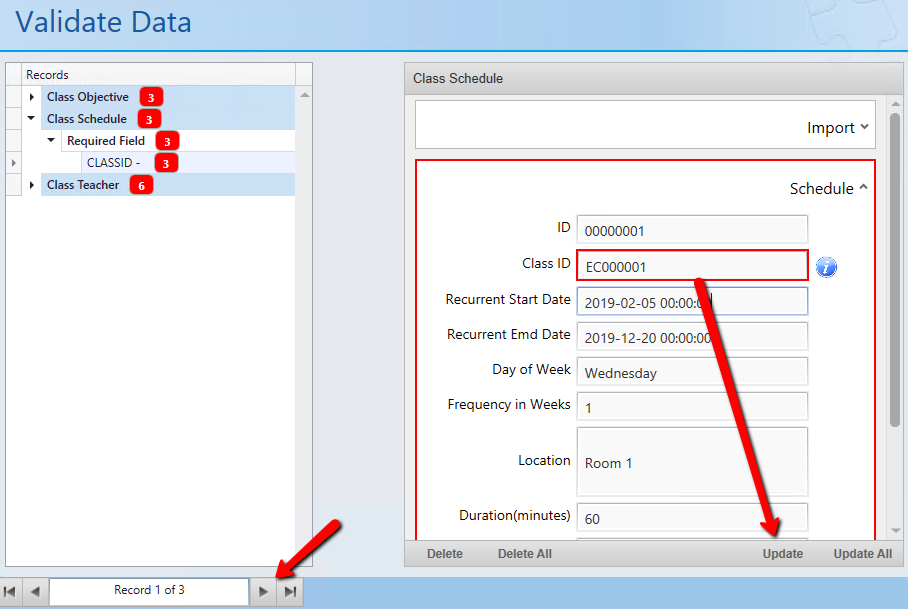
39.Open the next error for Class Schedule
40.The Class ID is a mandatory field that is missing. Enter the information and click Update and use the record selector to move to the next record and repeat entering the information for that record.
41.Open the next error for Class Teacher. Designation must match what has been setup under lookup values.
42.Change to either Primary, Secondary or Substitute
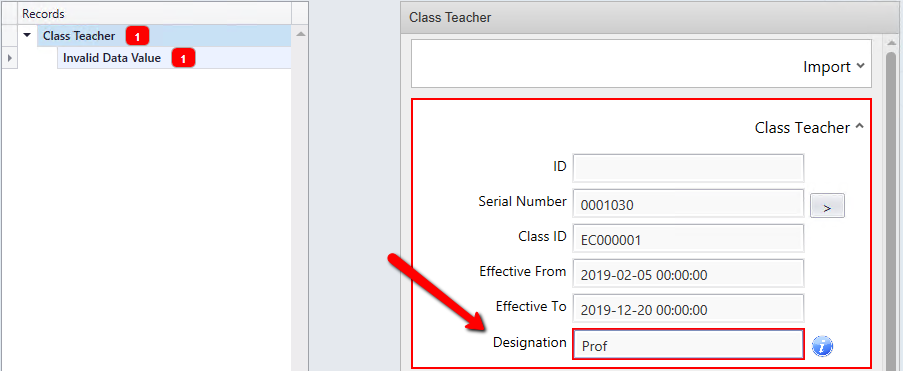
43.Click Update
44.Click Re-Validate on the tool bar

45.Click Yes

The validation has not passed as there have been some more errors found

46.Double click on the import in the Validation column
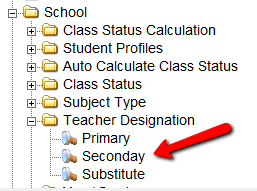
The Designation is showing that we have entered the incorrect information. We go to Lookup values and notice that a spelling mistake has been made. This should be edited for the correct spelling. You should logout of thankQ and log back in for the changes to take effect.
47.Click Re-Validate on the tool bar
48.Click Yes
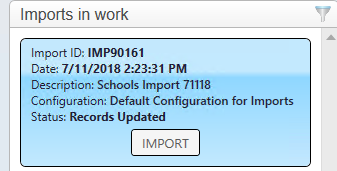
49.Click Update under Imports in work
50.Click Yes
51.Click Import
52.Click Yes