thankQ Help
The following steps will demonstrate how to create new contacts, relate them creating a household and use a default address, add payments and add a soft credit to the related person.
A spreadsheet with four sheets is required and a supporter id and receipt no. created to link the contact to the payments. Once imported the supporter id will be the serial number and the receipt no. with convert to a thankQ receipt number.
First Sheet

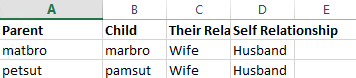
Second Sheet
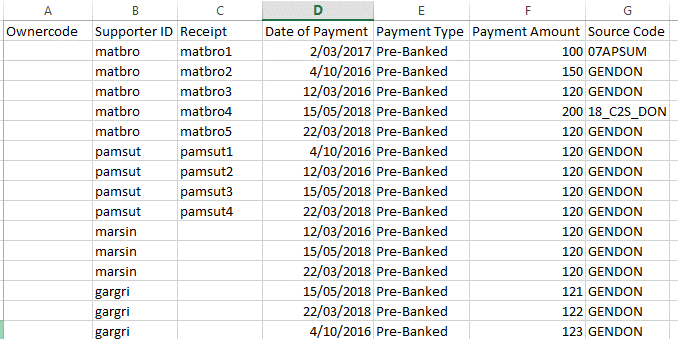
Third Sheet – receipt number only required if using soft credits
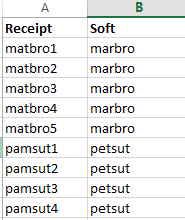
Fourth Sheet
1.Click Create on the tool bar of the Data Import form
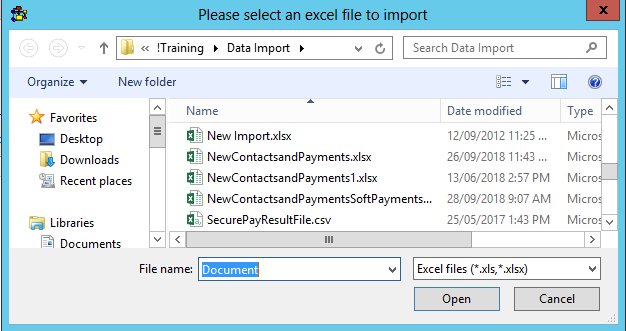
2.Click the ellipse on the Excel Input File line

3.Locate and select the import file
4.Enter an Import Description
5.Select a Configuration if applicable

6.Double click on A Cell above Ownercode to map to the thankQ field
7.Select Contacts from the drop down
8.Click O to locate fields starting with O
9.Double click on Ownercode
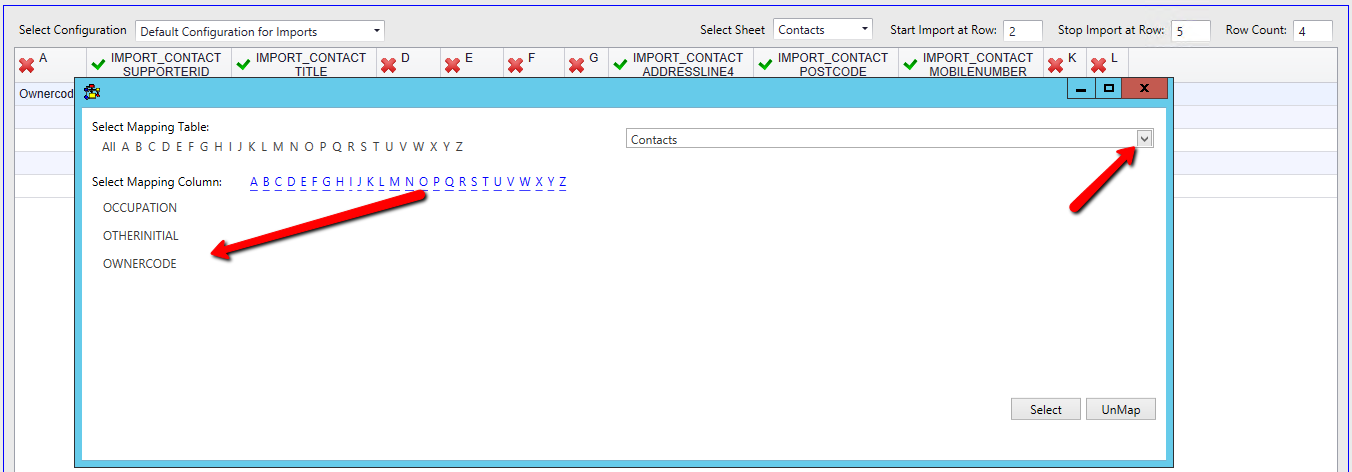
10.Continue to map all the fields
11.Select the second excel sheet

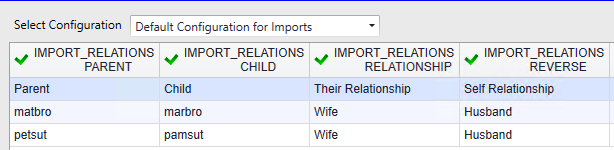
12.Map the relationship fields marked with an X, remembering that Parent is the record in focus and Child is the record being related to the record in focus
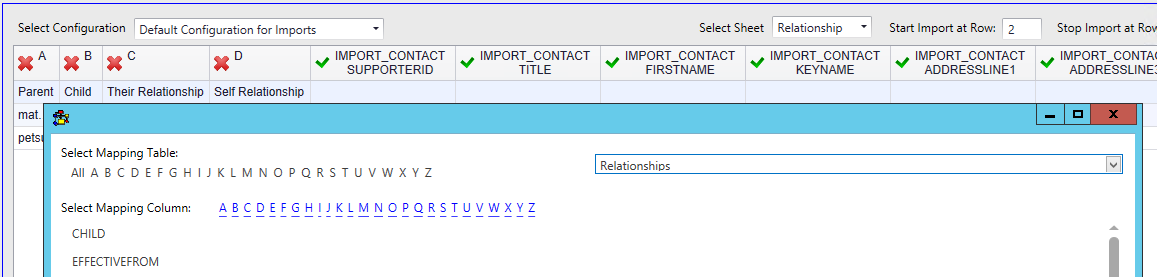
Example:
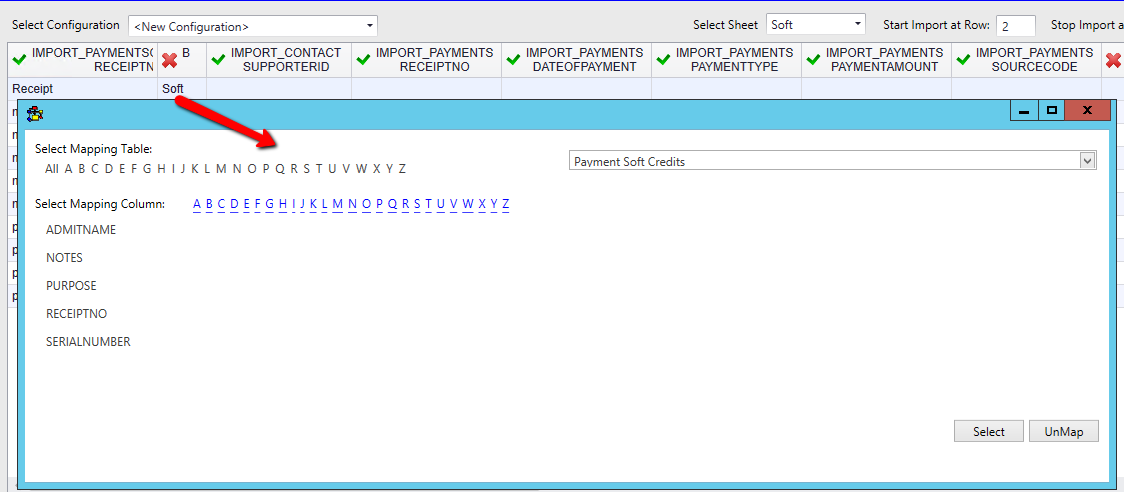
13.Select the third excel sheet and map the relevant fields

The Source Code has mapped to the Source Code table instead of the Payments table
14.Double click on the Source Code header
15.Select Payments from the drop down
16.Click S on the Select Mapping Column row
17.Double click on SourceCode

18.Select the fourth excel sheet and map the relevant fields
Example:

19.Click Log Data at the bottom right

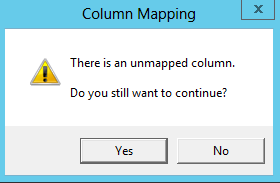
20.Click Yes if this message appears and you can proceed with unmapped fields
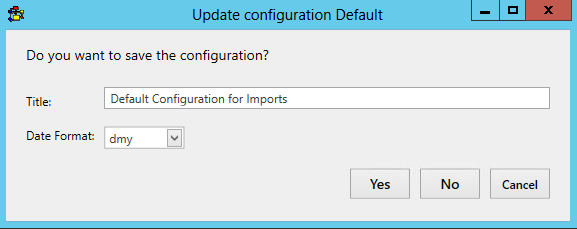
21.Click Yes to save the configuration or No to continue
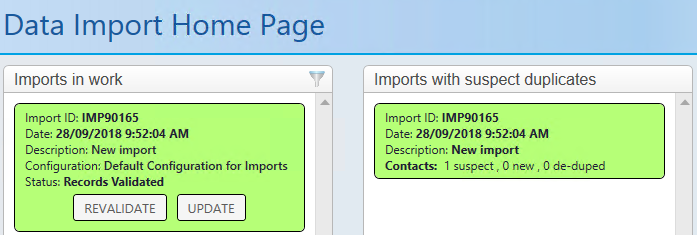
22.Click Validate on the import under Imports in work

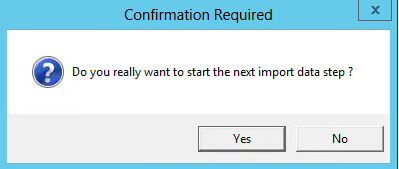
23.Click Yes to continue
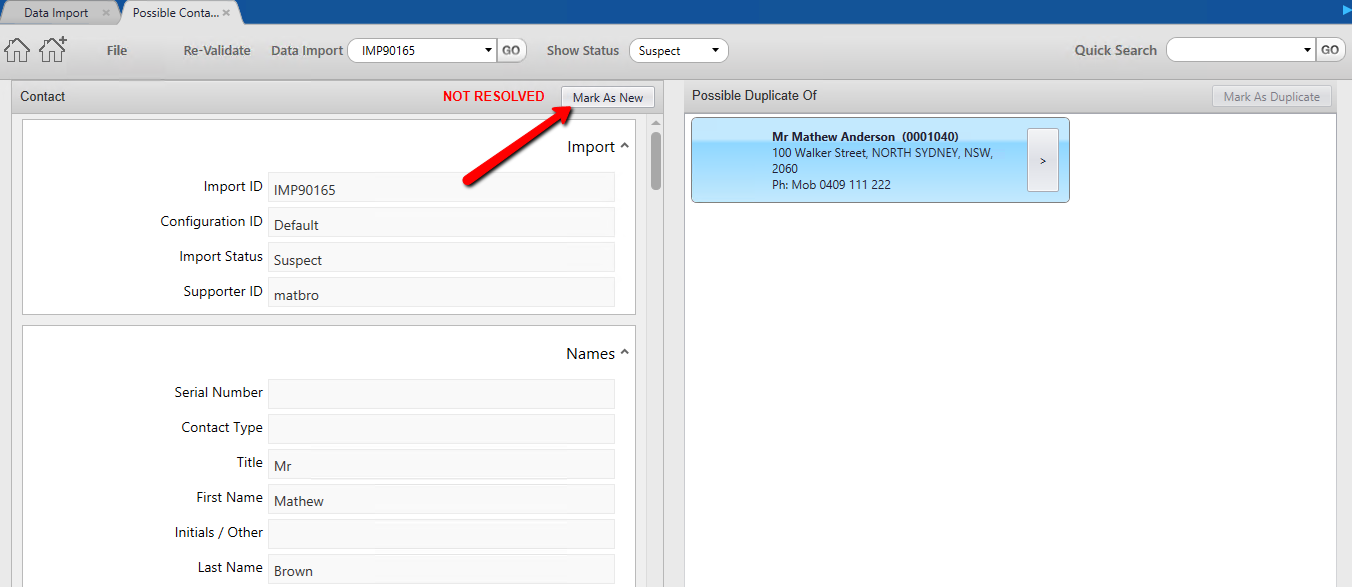
24.Double click to view the suspect duplicates
25.Decide if this is a duplicate or if it is a new contact and click the relevant button. In this case it is a new contact. They have the same address but different surnames.
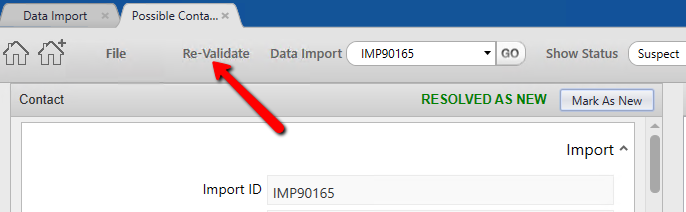
26.Click Re-Validate on the tool bar
27.Click Yes to continue
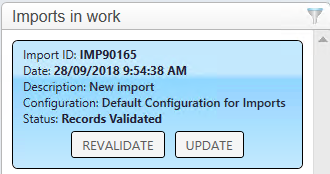
28.Click Update
29.Click Yes to continue
30.Click Import

31.Click Yes to continue
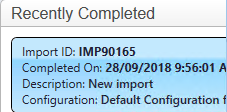
If there are no errors the import can be found under the Recently Completed window